Seaside memories
We honor our trip to the South by creating a pretty mobile with a piece of wood found on the shore, shells, stones, and pieces of polished glass picked up during our walks.
Stationery
- Galvanized metal wire ($3.49 for 15m, at Canadian Tire )
- 0.12 mm stainless steel and nylon wire ( Beadalon, $15.49 for 9.2 m, at DeSerres )
- Jewelry beads (various prices at DeSerres )
- Decorative buttons (prices vary at DeSerres )
- Drill with 5/64″ bit, hot glue
Realization
1. Using the drill, drill a hole at the top of each seashell.
2. With the galvanized metal wire, create a small spiral and attach a stone or a piece of polished glass to it using a little hot glue. Wait a few seconds for the glue to set, then wrap the wire around the stone or piece of glass. Fold the end of the wire to create a ring that will be used to hang our creation on the stainless steel and nylon wire. Cut the thread.
3. On a stainless steel and nylon thread of approximately 60 cm, thread shells, stones, pieces of polished glass, pearls, and pearly buttons, tying knots after each addition.
4. Wrap the end of the wires around a piece of wood and secure them with a dot of hot glue.
5. Hang the mobile using two lengths of stainless steel and nylon wire attached to each end of the piece of wood and knotted together in the center.
On the wine route
So as not to forget the weekend spent in the Eastern Townships savoring great local wines with good friends, we frame the label of our favorite wine with a photo of the moment and the comments of those with whom we shared it.
Stationery
- Linea II wooden frame, 11″ x 11″ (Nexxt Suspense, $14.95, at DeSerres )
- 8.5″ x 11″ sheet of paper ($0.59, at DeSerres )
- stick glue
Procedure
1. Remove the label from the wine bottle by soaking it in lukewarm water (it usually takes a few hours).
2. Put the label to dry on a cloth, taking care to place it faces down because the back will remain sticky as long as it is wet.
3. Stick the photo and the label on a nice sheet of paper with stick glue, then ask our friends to put their signature on it with a commentary on our winegrower’s getaway.
4. Place everything in a beautiful frame.
Road trip to Las Vegas
A map of the strip and tickets to a show we loved: here’s everything you need to create a convenient coat hook that will remind us of those good times every day.
Stationery
- 17.5″ x 5.25″ wooden address plaque ($14.95, at DeSerres )
- Mod Podge lustrous gloss ($6.95 for 236 ml, at DeSerres )
- Nystrom pewter hooks ($6.99 each, at Canadian Tire )
- Foam brush ($1, at Dollarama )
- Pencil, scissors, ruler, screwdriver
Realization
1. Place the plate on the back of the card and trace the outline with the pencil. Cut.
2. Using a foam brush, cover the surface of the plate with a good layer of Mod Podge, then stick the card, smoothing well to eliminate air bubbles.
3. Arrange the banknotes on the card symmetrically and stick them with Mod Podge. Decorate with acronyms and images taken from our tourist brochures.
4. Cover everything with a good layer of Mod Podge. Leave to dry for 4 hours, then apply a second thin coat.
5. Using the ruler and the pencil, mark three points 14 cm apart and 7 cm from the edge of the plate. Screw the hooks in place.
A romantic getaway in Paris
We will remember the beautiful moments spent on the banks of the Seine each time we unfold this practical coffee table adorned with photos of famous places, a menu from our favorite bistro, a museum ticket, and a euro banknote.
Stationery
- Simplicity Beech Folding Table ($13.39, at Canadian Tire )
- Glossy white and glossy black paint (Painter’s Touch, $5.97 for 236 ml, at Rona )
- Mod Podge lustrous gloss ($6.95 for 236 ml, at DeSerres )
- Gloss varnish (Delta Ceramcoat, $2.95 for 59 ml, at DeSerres )
- 50mm synthetic bristle angled brush (Rona, $14.69, at Rona )
- 15mm Carving Brush ($9.99, at Rona )
- Paint Pro masking tape (Cantech, $3.09 for 55 m, at Rona )
- #220 Very Fine Sandpaper
Implementation
1. Using sandpaper, sand the table to remove the thin layer of varnish and prepare the surface for painting.
2. Using the angled brush, paint the table top white and the legs black. Let the paint dry for about 8 hours, then paint a thin black line on top of the tray using the small paintbrush. To draw a straight line, use masking tape. Let dry for 24 hours.
3. Photocopy photos, cards, and tickets in black and white on card stock lay them out on the tabletop and stick them with Mod Podge.
4. Cover table surface with two coats of Mod Podge, allowing 4 hours to dry after each coat.
5. Wait another 24 hours to make sure everything is completely dry, then apply a coat of varnish to seal the surface well and protect it from splashes.
A perfume of Provence
To remember forever the beauty of the lavender fields of Provence or Stanstead, we decorate our bedside lamp with one of our most beautiful photos.
Stationery
- 10cm x 10cm x 22cm frosted glass table lamp ($9.99, at Ikea )
- 8.5″ x 11″ clear acetate or decal (3M, $14.74 for 5 sheets, at Staples )
- invisible adhesive tape
Realization
1. Choose a photo in horizontal format, then go to a printing center to have it printed, in 8.5 in. x 11 in. format, on the acetate. We can also do it ourselves with the transparent decal if we have an inkjet printer.
2. Attach the sheet to the surface of the lamp using adhesive tape.
Magical summer at Lac Corbeau
To decorate our child’s bed or add a little color to the armchair in the living room, we decorate a cushion with the photo of our youngest, captured on the spot in a moment of exciting discovery.
Stationery
- Avery Transfer Paper ($11.54 for 5 8-1/2″ x 11″ sheets, at Staples )
- Plastic and polyester butterflies ($1 for 2, at Dollarama )
- Ribbons and fabric glue
- inkjet printer
- Cushion whose colors match those of the photo (to make it yourself, see below)
- Needle and thread
Realization
1. We print our photos on transfer paper.
2. Using an iron, we print them on a cushion or pillowcase.
3. Using fabric glue or hot glue, glue the ribbons around the photo to create a frame. If using fabric glue, allow drying for 1 hour.
4. Sew on the butterflies by making a few seams with thread and a needle. (boxed)
Make your own cushion
Stationery:
- 40 cm x 40 cm wad
- 50cm x 100cm piece of fabric
Achievement
1. Wash and dry the stuffing and fabric according to the manufacturer’s instructions.
2. Sew the fabric inside out on three sides, creating a 2.5 cm border, which is folded over on itself twice. For the fourth side, sew about 10 cm at each end, leaving an opening in the center large enough to insert the stuffing.
3. Turn the fabric envelope right side out, insert the stuffing, then sew the opening.
Gourmet adventure in Spain
As we taste the succulent treats brought back from our recent trip to Spain, we keep the packaging to decorate our coffee pot and thus put a little cheerfulness on the kitchen counter.
Stationery
- Glass jar with stainless steel lid ($5.99, at Canadian Tire )
- Mod Podge lustrous gloss ($6.95 CAD for 236 ml, at DeSerres )
- Foam brush ($1, at Dollarama )
- Scissors, glue stick
Realization
1. Cut out images and logos from candy wrappers, playing with sizes and formats.
2. By overlapping them, arrange the pieces of packaging so as to cover the entire surface of the jar. Glue them to the pot with Mod Podge, taking care to smooth the paper well to eliminate air bubbles. Important: choose a pot with straight lines to facilitate application and avoid having to fold the paper.
3. Once the pot is completely covered, apply a good coat of Mod Podge over the entire surface. Let dry for 4 hours, then apply a second coat.
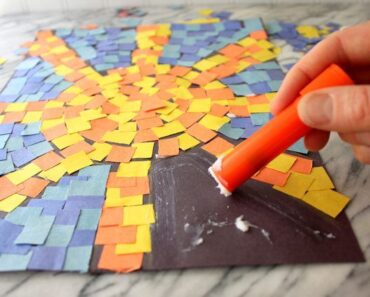
4. To decorate the lid, use a glue stick to adhere to the paper.


